Viathan S002T3V 128GB 3D NAND SATA 2.5 Inch Internal SSD
good item AAA++++++++++++++++++
| Feature | Details |
|---|---|
| Storage Capacity | 2 TB |
| Model | S002T3V |
| Read Speed | Up to 540MB/s |
| Write Speed | Up to 500MB/s |
| Form Factor | 2.5" / 2.5-inch |
| Interface | SATA III |
| Transfer Speed | 6 Gb/s |
| Type | Internal SSD |
| Brand | Viathan |
| Warranty | 3-Year Limited |

Step 1
Turn off your laptop and unplug it from the power source.

Step 2
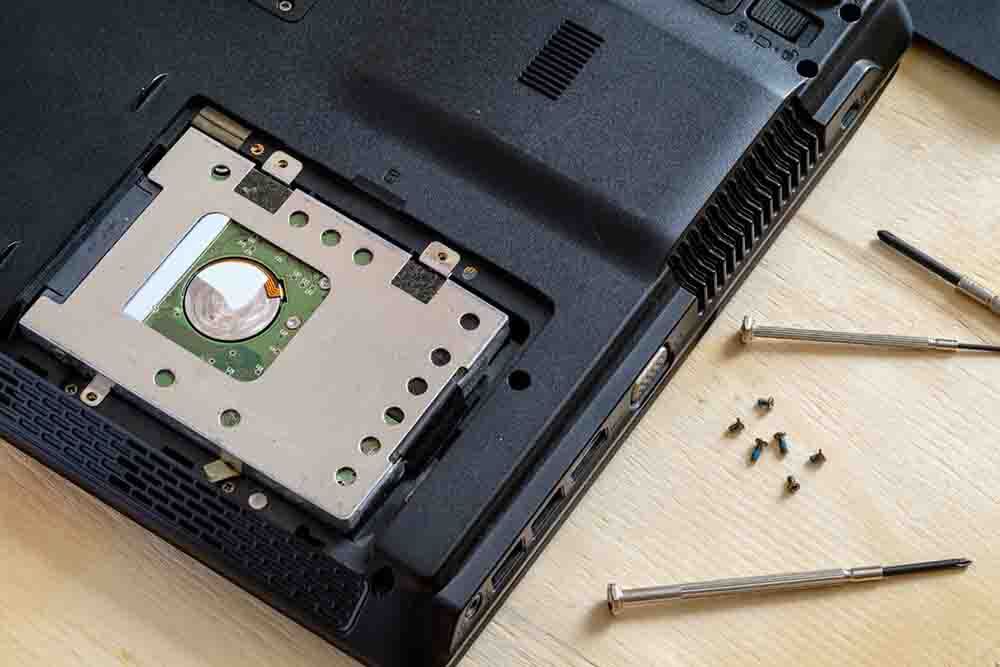
Locate the access panel on the bottom of your laptop. This panel may have a specific symbol indicating the hard drive or SSD.

Step 3
Use a screwdriver to remove the screws securing the access panel. Set aside the screws in a safe place. Gently remove the access panel to reveal the internal components.

Step 4
Identify the existing storage drive in your laptop, usually a 2.5-inch HDD (Hard Disk Drive).

Step 5
Carefully disconnect any cables or connectors attached to the existing drive. Remove the existing drive from its mounting bracket or caddy, if applicable. If necessary, attach the mounting bracket or caddy to your new SATA SSD.

Step 6
Align the SATA SSD with the appropriate connector and slide it into the available slot. Secure the SSD in place using any screws or clips provided or by reinstalling the mounting bracket or caddy. Reconnect any cables or connectors that were previously attached to the old drive. Replace the access panel and secure it with the screws.

Step 1
Shut down your desktop PC and unplug it from the power source.

Step 2
Open the case of your desktop PC. Refer to the user manual or manufacturer's instructions for your specific PC model.

Step 3
Locate the drive bays in your desktop case. These are typically located in the front or side of the case. Identify an available drive bay and remove any mounting brackets or caddies if necessary. If you have an empty 3.5-inch drive bay, you may need to use a 2.5-inch to 3.5-inch adapter bracket to fit your SATA SSD.

Step 4
Attach the mounting bracket or caddy to your SATA SSD, if required. Slide the SATA SSD into the drive bay, ensuring a secure fit.

Step 5
Use screws or clips to secure the SSD in place, if provided. If using an adapter bracket, secure the bracket in the drive bay using screws.

Step 6
Locate an available SATA data cable (usually included with your motherboard or available separately) and connect one end to the SATA port on the SSD.

Step 7
Connect the other end of the SATA data cable to an available SATA port on your motherboard.

Step 8
Locate an available SATA power cable from your power supply unit (PSU) and connect it to the power connector on the SSD.

Step 9
Close the case of your desktop PC and secure it using the appropriate screws.

Step 10
Plug in your desktop PC and power it on.

Step 11
Enter the BIOS/UEFI settings to verify that the new SSD is detected.

Step 12
Once the SSD is recognized, you may need to initialize and format it using your operating system's disk management tool.
| Delivery Services |
Royal Mail 24 Royal Mail Tracked 24 |
|---|---|
| Delivery Cost |
Royal Mail 24: £0.00 (FREE) Royal Mail Tracked 24: £4.99 |
| Delivery Time |
Royal Mail 24: 1 to 5 Working Days Royal Mail Tracked 24: Next Working Day (If ordered before 4:00pm BST or GMT) |
| Delivery Country |
United Kingdom (England, Scotland, Wales and Northern Ireland) + All UK Islands and dependencies |
| 3-Year Limited Warranty |
Viathan affirms that this product is devoid of defects in materials and workmanship, leading to product failure under normal usage conditions, as detailed on this page. This assurance extends for a period of 3 year from the original purchase date. We pledge to replace, free of charge, any item from the original order that proves faulty due to defective materials or workmanship. In instances where replacement is impractical, we retain the right to propose an alternative of equal or greater value (with the customer covering any additional costs). This warranty is non-transferrable and exclusively applies to the original purchaser. Proof of purchase is mandatory for all potential warranty claims. |
|---|---|
| Not Covered by the Warranty |
|
| Warranty Becomes Void If |
|
| Returns Criteria |
Opened Items: Returns accepted within 60 days from the date of receipt. Unopened items: Returns accepted within 365 days from the date of receipt. |
| Packaging Requirement |
Original packaging must be included for items eligible under our 30-day money-back guarantee and our 365-day returns policy. For items damaged on delivery, we understand packaging might not be available. |
| How to Return an Order |
1. Contact us through our contact page and provide your order number and email address. 2. We will issue you an RMA (Return Merchandise Authorization) number and provide a returns label. |
| Processing Time |
1. Use the provided return label, and the item will be returned within 2-5 working days. 2. Refund or Replacement will be processed on the same day as receipt. |
good item AAA++++++++++++++++++
Happy for the second time, Thank you
All Very Good
excellent cheers +++++++++++++++++++++++++
Thanks you for the fast and quality delivery! ??
Fast delivery. Great price!
Excellent Service A+++++++++++++++++++
nice
Great seller!
Excellent, couldn't do better.
Thanks for the very quick delivery
Good seller